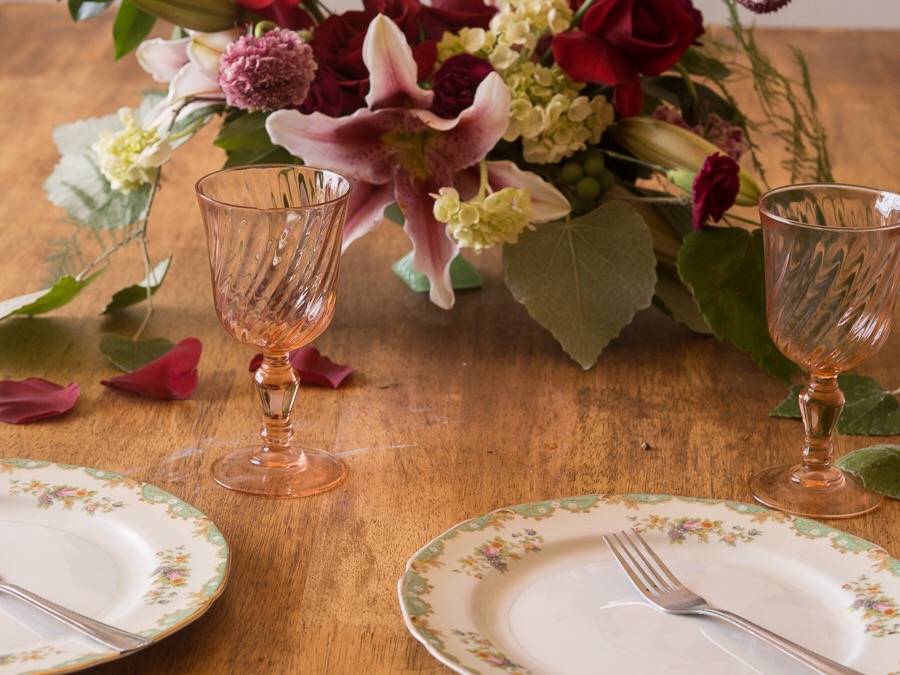
Flowers are one of my favorite ways to infuse life and beauty into our home. While I hope to grow a picking garden of my own some day, more practically in this part of life, I set aside a bit of our grocery budget each week and pick up a few simple blooms for our table or nightstands or kitchen sink. Flowers make my heart hum and help cultivate my sense of home and emotional well-being, but when it comes to arranging flowers, it always feels a bit more like trial and error. My arrangements often appear hopelessly amateur. In honor of Mother’s Day this weekend in the US, I asked my talented friend Jessica Jill of Ivy Florals to share some of her secrets for creating a beautiful bouquet with market blooms. You can also find her gorgeous work on Instagram.
This weekend, I put together a quick bouquet for Mother’s Day, something simple, yet lovely, like my mother herself. As a wedding/event florist, I often use wholesalers for flowers, but to create small or single arrangements, I often run to the nearby grocery store. Luxe brand grocers will often have a larger variety, but markets of every sort have started carrying more and more varieties of flowers to meet the growing demand, such as those little pale pink, nodding heads shown above, Scabiosa. Grocers are also beginning to put together little bouquets called “designer bunches” that have everything you need to make a dynamic arrangement on your own. But don’t be afraid to use a mixture of market flowers and foliage straight from your own yard!
When purchasing flowers from the grocery store, there are five vital things to consider for your design to have structure & character. I learned these from The Flower Recipe Book by Studio Choo.
Base Foliage | Greenery, get something that fills space easily & something else that adds form. In my arrangement, I used Cherry Laurel (snipped from a tree by my house) and a Grapevine (also snipped by my house)!
Base Flowers | Hydrangeas, Roses, something that fills spaces with color!
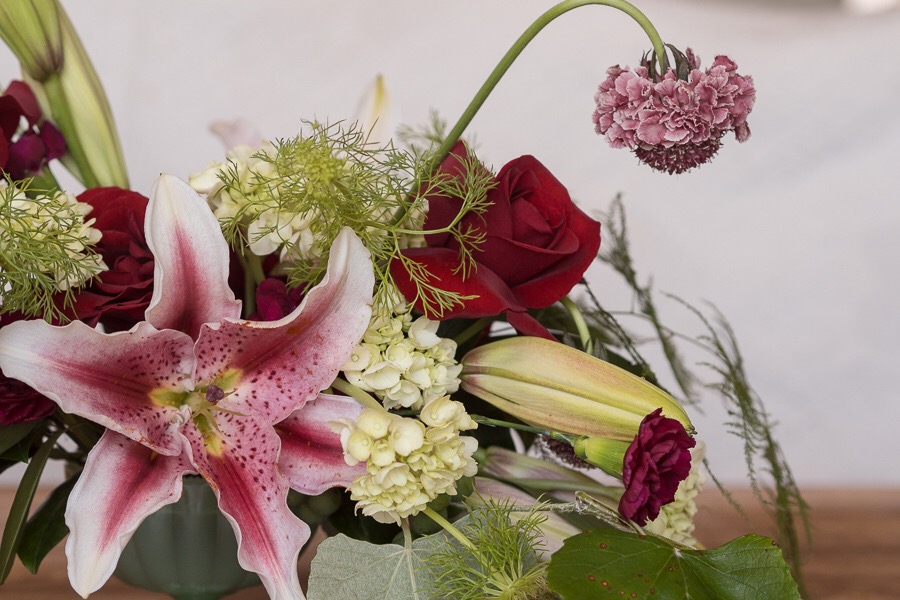
Focal Flowers | Lilies, or something that draws the eye, has interesting form, and is just nice to look at.
Secondary Flowers | Carnations, Scabiosa, usually a flower with longer stems that can encourage shape in the arrangement
Bits| Fern, smaller flowers or greenery that fill space with a softer texture
As far as picking the color of your flowers goes, get what makes you smile. You’ll be surprised how well your eye naturally picks colors that look good together.
Once you get home from the store, processing the flowers is very important! For processing, you will need some snips or floral scissors. Once you have your stems, snip snip snip those stems at a 45 degree angle, remove any foliage that might end up in the water when you begin to arrange & get them in some warm water ASAP. Also make sure to pull off any decaying leaves/petals to help the flowers last longer & look their best!
An outlier is roses, I usually dehydrate my roses for a couple hours before I start designing. This makes their petals more apt to open up to a big bloom with a little help from you. This helps turn the roses from tight, traditional-looking blooms, to fresh from the garden-looking blooms with gorgeous heads.
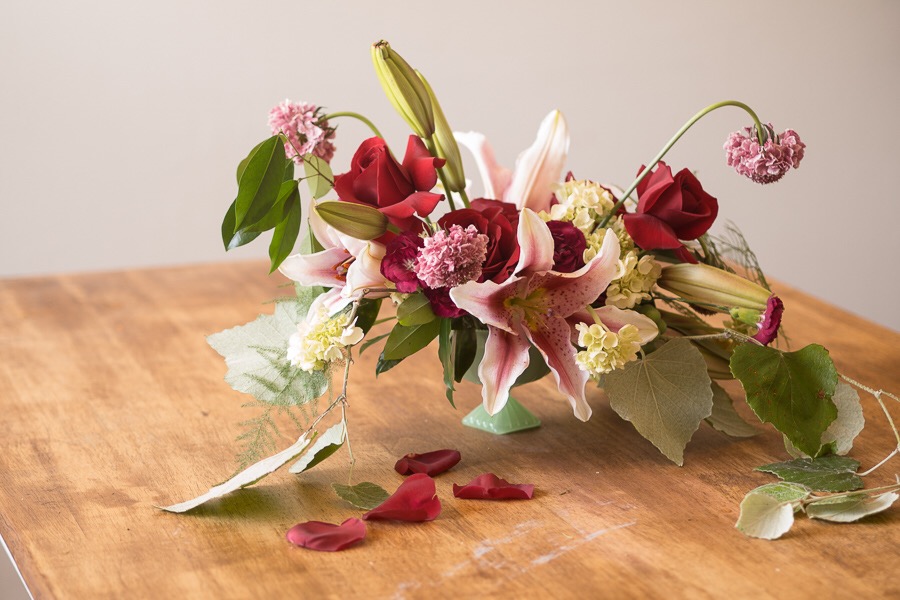
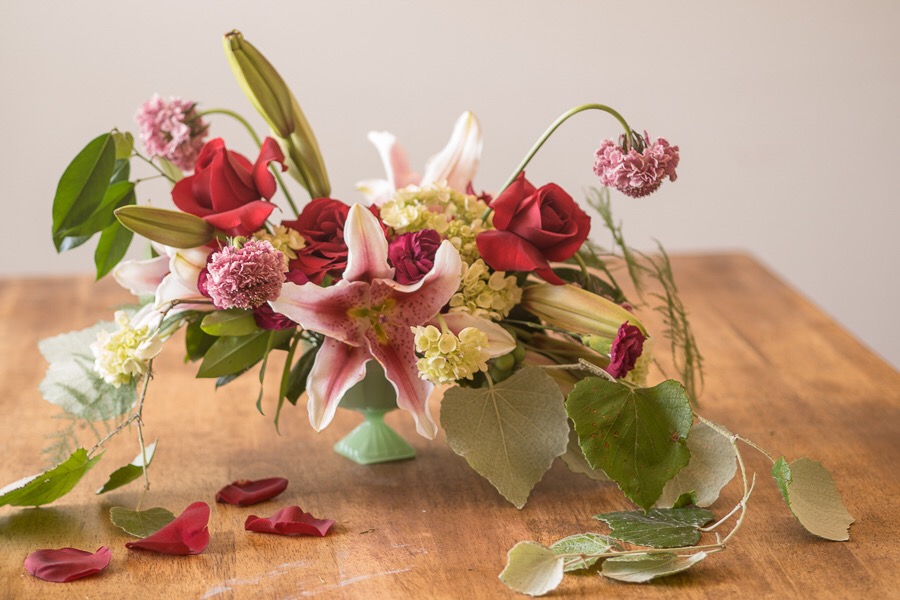
Having good floral product is only the start of how to DIY your own arrangements. In this post, I’m going to run you through some design tips on how to turn a bag full of flowers into something like you see above!
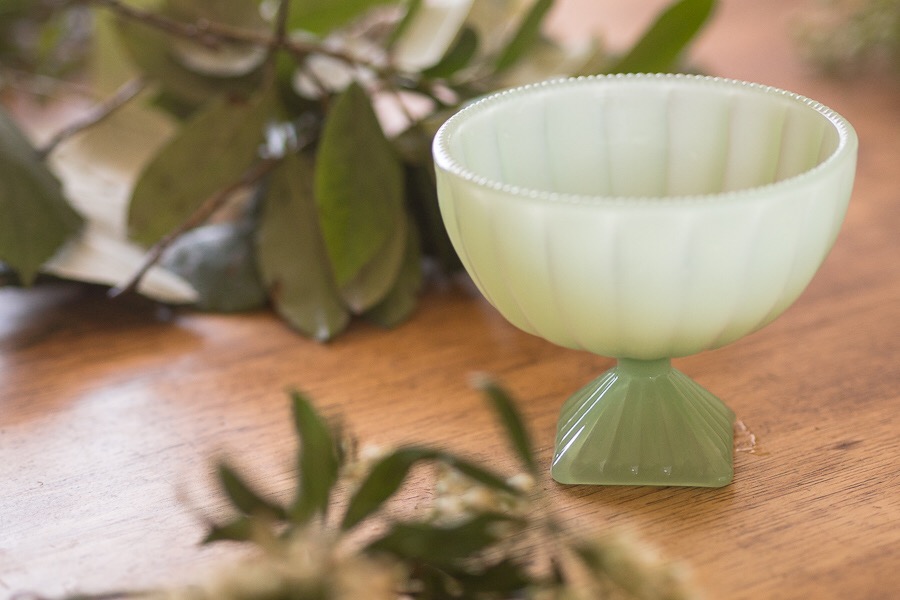
Find a beautiful vase | To start yourself off well, find a super cool vase. Be creative. My vase is really a dessert bowl I transformed by adding my little frog.
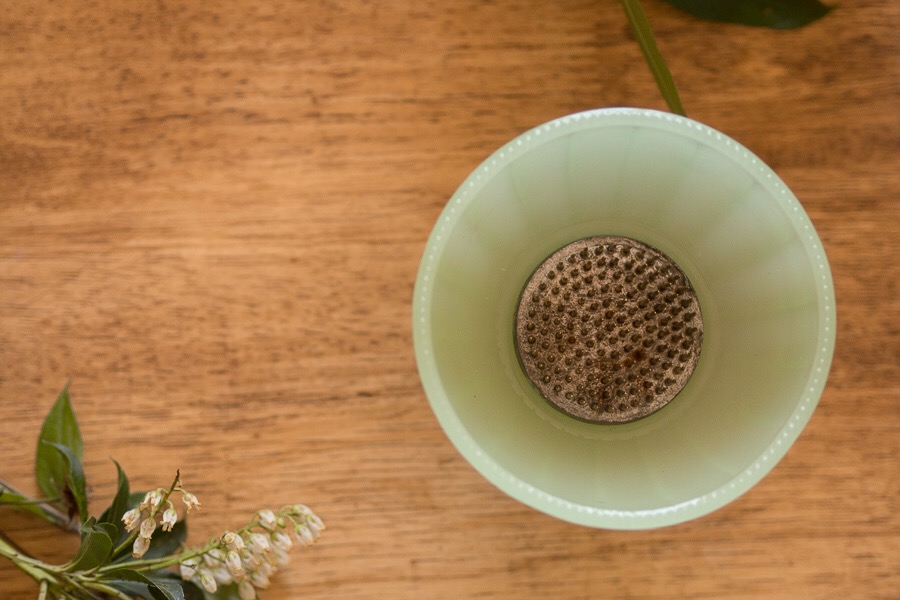
Place a floral pin frog | Honestly, with a little help from floral pin frogs, you can turn any watertight object into a home for your blooms. You can get floral pin frogs online or from a craft store. They’re reusable and invaluable for arrangements. I usually just place my frog in the vase without any sort of adhesive but if you have heavier blooms, it might be a good idea to use some floral clay to stick it to the inside of the vase.
Add warm water | After you add your frog, add a little warm water to the mix & you’re got a solid base for your arrangement! When adding flowers to the arrangement, a pin frog is easy to use. You simply press the stem into the pins until the flower or greenery stands the way you want it to. Next, you get to start the fun part! DESIGNING!
Start with Your Greens | And don’t be afraid to add a lot. You want to use your greens to both establish a shape for your design but also cover your mechanics ie your pin frog. I usually evaluate the form of the greens & place more upright greens on one end of the design & more “droopy” greens on the other. This “S” shape helps draws the eye through your entire design. Keep this thought in mind during your entire time designing, even when you start adding your flowers. Upright on one side, droopier on the other. After you add your greens & get an established shape, you can start adding in flowers.
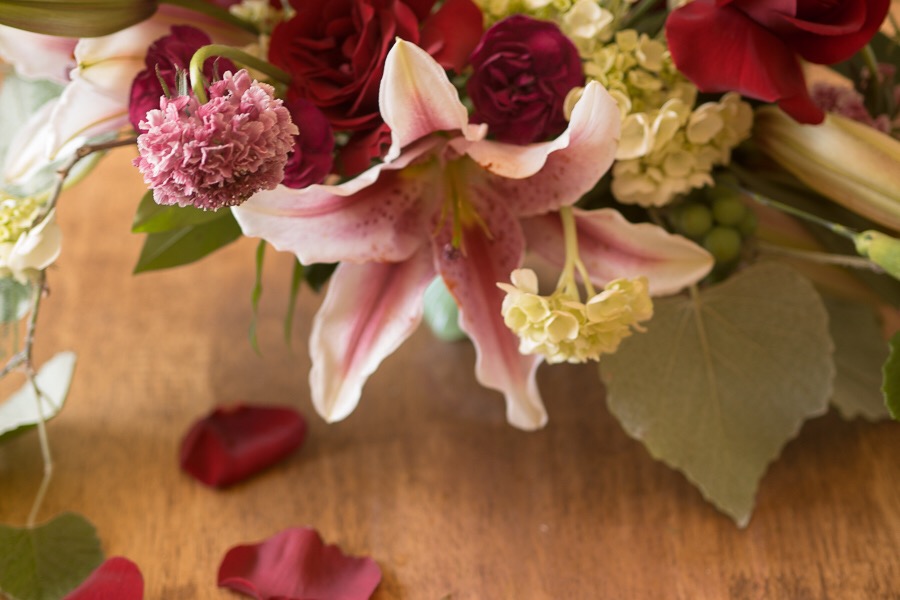
Add focal flowers | Focal flowers first because their placement is very important. You want them front & center. The lily in my arrangement is my focal flower. Note how it is the first thing your eye is drawn to when you look at the photo. When adding in focal flowers, I usually take three nice, open blooms and place them strategically in the arrangement. I usually keep some closed blooms off to the side to add in later. This adds a story to your design where you can include more than one life cycle of the flower in the arrangement. Also – in a couple days, those closed blooms will open & add some second day zest to your gift! I place one in the very front close to the rim of the vase, facing me, almost looking me in the face. I then place another focal flower, one that is a little droopier on one side of the arrangement. If you don’t have a droopy bloom, you can angle the flower to where it looks droopy by pinning it at an angle in the pin frog. Lastly, I place the third focal flower upright on the other side of the arrangement.
Add base flowers | Once you have your 3 focal flowers added, you can move on to adding your base flowers. I usually mimic the placement of base flowers, close to or behind the focal flowers to keep with the shape of the arrangement. I used the roses & hydrangeas as my base flowers in this design. Base flowers are also used to cover mechanics that you can still see even after foliage & focal flowers have been added. They’re very helpful in filling out the inside center of the arrangement so that when the design is looked at from above, It is not empty-looking.
Dehydrate Roses | This step is where rose processing I wrote about above, comes in. In my arrangement, I dehydrated my roses for 2 hours, then began to pull back the petals, softly bending them until I felt a soft pop from the center of the rose and the petal stayed splayed out.
Add in secondary flowers | After that, add in your secondary flowers. I used Scabiosa & Carnation as mine. Use these to enhance the shape that you’ve created. Again, droopier ones on one side, upright on the other!
Finish with bits | Lastly, add your bits. Use intuition & your eye to know where to place these. Areas that seem empty or boring to your eye are ideal places for these. I used fern as my bits. The soft texture of ferns is ideal for bits! Other things that could be bits or “fillers” as some grocery stores call them are chamomile, baby’s breath, daisy mums etc. Be mindful when caring for bits, that their stems need to be fully submerged in water. They’re delicate & usually need good water intake so that they don’t wilt.
Finishing touches | Now, you’re done! Take a look at your design. If you see any holes or places where your eye stops, use those leftover closed or less open blooms to fill in that space. You can also add leftover base flowers if you think you need it. Remember to trust your eyes. If you like the way something is looking, go with it! Something I love about being a florist is the freedom that comes with working with beautiful product. The flowers speak for themselves, so no matter what you create, it will hold beauty. Your design is there to enhance what already makes the heart soar.
Maintain freshness | To keep your arrangement fresh for longer, check the water daily to make sure all stems are submerged & the water is clean. If flowers start to decay, remove them. Some flowers will stay fresh longer than others so it is important to check on your design, making sure shorter vase-life flowers are not causing other flowers with longer vase-life to die quickly as well. If you leave decaying flowers in the vase with fresh ones, a hormone is release from the decaying flowers that causes decay to speed up in the rest of the flowers as well! Best of luck to you in your designing endeavors.

Comments
Happy Mother’s Day, beautiful one.
Love you, friend! x
It was so wonderful to have the opportunity to write this with you, Bethany! You’re the kindest soul.
Thank you so much for sharing! So many helpful tips—I definitely need one of those frog things.